| Version 2 (modified by , 9 years ago) ( diff ) |
|---|
Tutorial 3: Servos calibration
There are different reasons why we need to calibrate servos, depending on:
- how servos are attached to the robot
- what servos we actually use
- how accurate servos are
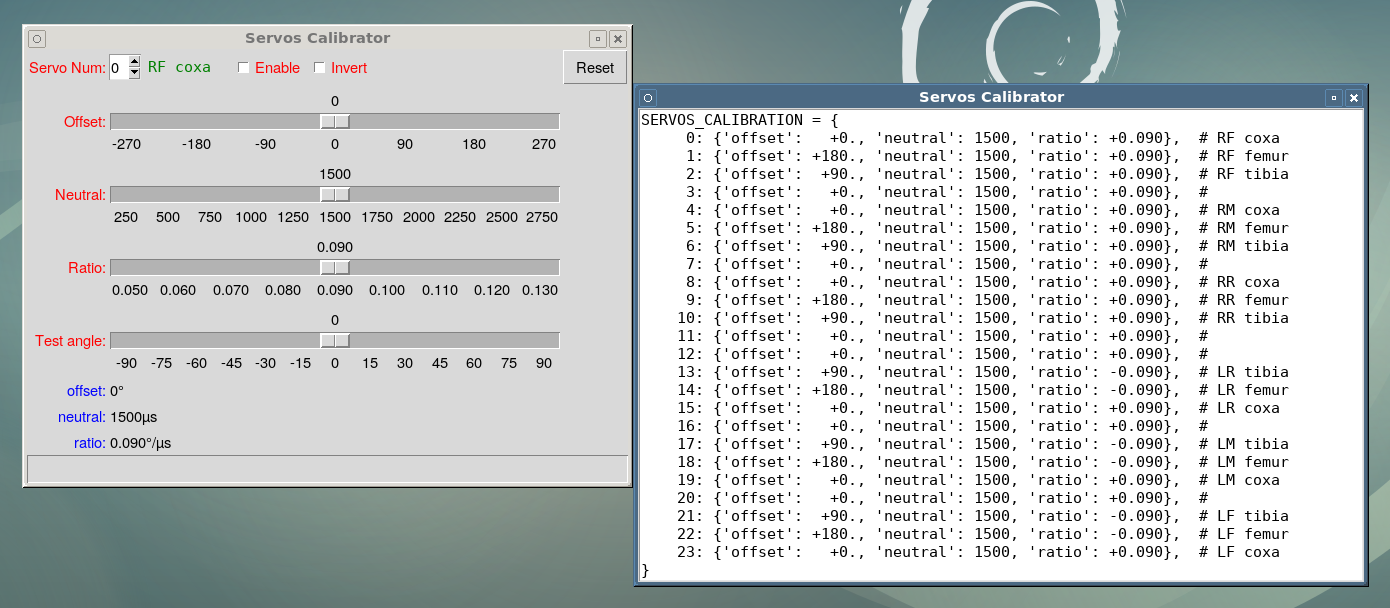
py4bot-gui-servocal.py script can be used to fine tune our servos calibration, and generate the SERVOS_CALIBRATION dict.

Most servos have a range of 180° (more or less), and their neutral position (mid-range) is around 1500µs. It is important to mount the servos on the robot so the we can reach the joints positions ranges we want.
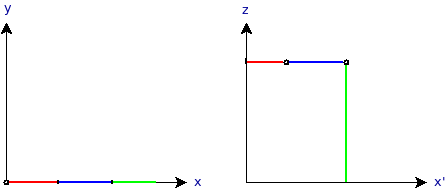
The following picture shows the usual joints positions when servos are at neutral, for a 3 DoF leg:

Looking how Py4bot internally manages angles (UserGuideGit#a3DoFleg), we can see that matching joints positions are:
- coxa = 0°
- femur = 180°
- tibia = 90°
This means that there will be some offsets between the servo angles and the framework angles.
Another thing to tune is the servo neutral position, to correct mechanical errors.
Last thing to tune is the ratio between pulse variation and real servo displacement. This ratio varies a lot from a brand to another. And even for a same model, it varies from a servo to another. This is especially true for low cost servos.
Offsets and ratios are defined in the SERVO_CALIBRATION table.
Here is how to use py4bot-gui-servocal.py.
We first need to enable the servo, by clicking the Enable checkbox. Then, we need to check if the servo rotates the right direction: increasing the pulse value should increase the joint angle (= make in turn in the trigonometric sense in the leg coordinate system). If it is not the case, we just click the Invert checkbox (usually, coxa joints are all the same, and other joints should be inverted for legs of one side, but it depends if there is a symmetry in the mechanics or not).
Then, we can set the offset as shown above by moving the Offset slider. This has no impact on the servo position, but changes the table offset.
Next, we need to fine tune the servo neutral position. To do this, we move the Neutral slider until we mechanically reach the correct neutral position.
Once this is done, we can adjust the ratio. This step is a little bit harder, as we need to measure the angle the joint really moves. The best way is to move up to +-90°, as it is visually easy to see, but it is not always mechanically possible, and we can restrict the range to +-45°. But we have to keep in mind that the larger the angle is, the better the accuracy will be.
So, we move the Test Angle slider to 45°. Then, we move the Ratio slider so the joint really reaches 45°. Finally, we can check if going to -45° moves the joint to the symmetrical position.
We of course need to repeat the entire procedure for each servo/joint, which can be tedious for a 4 DoF hexapod :o/ But after that, our robot should walk better ;o)
Note that if we already have a settings.py module, we can launch py4bot-gui-servocal.py from the directory containing that module in order to reload the previous values. And if the module contains a LEGS_SERVOS_MAPPING, the script will show the legs/joints names. So, it is better to start writing this param, before launching the script.
In the next tutorial, we will see how to add a new gamepad support.
Attachments (2)
- py4bot-gui-servocal.png (233.0 KB ) - added by 9 years ago.
- IK3DoF_neutral.png (1.7 KB ) - added by 9 years ago.
Download all attachments as: .zip